Friday, 25 October 2013


As explained in previous chapter, elements may contain attributes that are used to set various properties of an element.
Some attributes are defined globally and can be used on any element, while others are defined for specific elements only. All attributes have a name and a value and look like as shown below in the example.
Following is the example of an HTML5 attributes which illustrates how to mark up a div element with an attribute named class using a value of "example":
<div class="example">...</div>
Attributes may only be specified within start tags and must never be used in end tags.
HTML5 attributes are case insensitive and may be written in all uppercase or mixed case, although the most common convention is to stick with lowercase.

Standard Attributes:

The attributes listed below are supported by almost all the HTML 5 tags.
AttributeOptionsFunction
accesskeyUser DefinedSpecifies a keyboard shortcut to access an element.
alignright, left, centerHorizontally aligns tags
backgroundURLPlaces an background image behind an element
bgcolornumeric, hexidecimal, RGB valuesPlaces a background color behind an element
classUser DefinedClassifies an element for use with Cascading Style Sheets.
contenteditabletrue, falseSpecifies if the user can edit the element's content or not.
contextmenuMenu idSpecifies the context menu for an element.
data-XXXXUser DefinedCustom attributes. Authors of a HTML document can define their own attributes. Must start with "data-".
draggabletrue,false, autoSpecifies whether or not a user is allowed to drag an element.
heightNumeric ValueSpecifies the height of tables, images, or table cells.
hiddenhiddenSpecifies whether element should be visible or not.
idUser DefinedNames an element for use with Cascading Style Sheets.
itemList of elementsUsed to group elements.
itempropList of itemsUsed to group items.
spellchecktrue, falseSpecifies if the element must have it's spelling or grammar checked.
styleCSS Style sheetSpecifies an inline style for an element.
subjectUser define idSpecifies the element's corresponding item.
tabindexTab numberSpecifies the tab order of an element.
titleUser Defined"Pop-up" title for your elements.
valigntop, middle, bottomVertically aligns tags within an HTML element.
widthNumeric ValueSpecifies the width of tables, images, or table cells.

Custom Attributes:

A new feature being introduced in HTML 5 is the addition of custom data attributes.
A custom data attribute starts with data- and would be named based on your requirement. Following is the simple example:
<div class="example" data-subject="physics" data-level="complex">
...
</div>
The above will be perfectly valid HTML5 with two custom attributes called data-subject and data-level. You would be able to get the values of these attributes using JavaScript APIs or CSS in similar way as you get for standard attributes.


When a user visit your website, they do things like click on text and images and given links, hover over things etc. These are examples of what JavaScript calls events.
We can write our event handlers in Javascript or vbscript and you can specify these event handlers as a value of event tag attribute. The HTML5 specification defines various event attributes as listed below:
There are following attributes which can be used to trigger any javascript or vbscript code given as value, when there is any event occurs for any HTM5 element.
We would cover element specific events while discussing those elements in detail in subsequent chapters.
Attribute Value Description
offlinescriptTriggers when the document goes offline
onabortscriptTriggers on an abort event
onafterprintscriptTriggers after the document is printed
onbeforeonloadscriptTriggers before the document loads
onbeforeprintscriptTriggers before the document is printed
onblurscriptTriggers when the window loses focus
oncanplayscriptTriggers when media can start play, but might has to stop for buffering
oncanplaythroughscriptTriggers when media can be played to the end, without stopping for buffering
onchangescriptTriggers when an element changes
onclickscriptTriggers on a mouse click
oncontextmenuscriptTriggers when a context menu is triggered
ondblclickscriptTriggers on a mouse double-click
ondragscriptTriggers when an element is dragged
ondragendscriptTriggers at the end of a drag operation
ondragenterscriptTriggers when an element has been dragged to a valid drop target
ondragleavescriptTriggers when an element leaves a valid drop target
ondragoverscriptTriggers when an element is being dragged over a valid drop target
ondragstartscriptTriggers at the start of a drag operation
ondropscriptTriggers when dragged element is being dropped
ondurationchangescriptTriggers when the length of the media is changed
onemptiedscriptTriggers when a media resource element suddenly becomes empty.
onendedscriptTriggers when media has reach the end
onerrorscriptTriggers when an error occur
onfocusscriptTriggers when the window gets focus
onformchangescriptTriggers when a form changes
onforminputscriptTriggers when a form gets user input
onhaschangescriptTriggers when the document has change
oninputscriptTriggers when an element gets user input
oninvalidscriptTriggers when an element is invalid
onkeydownscriptTriggers when a key is pressed
onkeypressscriptTriggers when a key is pressed and released
onkeyupscriptTriggers when a key is released
onloadscriptTriggers when the document loads
onloadeddatascriptTriggers when media data is loaded
onloadedmetadatascriptTriggers when the duration and other media data of a media element is loaded
onloadstartscriptTriggers when the browser starts to load the media data
onmessagescriptTriggers when the message is triggered
onmousedownscriptTriggers when a mouse button is pressed
onmousemovescriptTriggers when the mouse pointer moves
onmouseoutscriptTriggers when the mouse pointer moves out of an element
onmouseoverscriptTriggers when the mouse pointer moves over an element
onmouseupscriptTriggers when a mouse button is released
onmousewheelscriptTriggers when the mouse wheel is being rotated
onofflinescriptTriggers when the document goes offline
onoinescriptTriggers when the document comes online
ononlinescriptTriggers when the document comes online
onpagehidescriptTriggers when the window is hidden
onpageshowscriptTriggers when the window becomes visible
onpausescriptTriggers when media data is paused
onplayscriptTriggers when media data is going to start playing
onplayingscriptTriggers when media data has start playing
onpopstatescriptTriggers when the window's history changes
onprogressscriptTriggers when the browser is fetching the media data
onratechangescriptTriggers when the media data's playing rate has changed
onreadystatechangescriptTriggers when the ready-state changes
onredoscriptTriggers when the document performs a redo
onresizescriptTriggers when the window is resized
onscrollscriptTriggers when an element's scrollbar is being scrolled
onseekedscriptTriggers when a media element's seeking attribute is no longer true, and the seeking has ended
onseekingscriptTriggers when a media element's seeking attribute is true, and the seeking has begun
onselectscriptTriggers when an element is selected
onstalledscriptTriggers when there is an error in fetching media data
onstoragescriptTriggers when a document loads
onsubmitscriptTriggers when a form is submitted
onsuspendscriptTriggers when the browser has been fetching media data, but stopped before the entire media file was fetched
ontimeupdatescriptTriggers when media changes its playing position
onundoscriptTriggers when a document performs an undo
onunloadscriptTriggers when the user leaves the document
onvolumechangescriptTriggers when media changes the volume, also when volume is set to "mute"
onwaitingscriptTriggers when media has stopped playing, but is expected to resume

Web Forms 2.0 is an extension to the forms features found in HTML4. Form elements and attributes in HTML5 provide a greater degree of semantic mark-up than HTML4 and remove a great deal of the need for tedious scripting and styling that was required in HTML4.

The <input> element in HTML4

HTML4 input elements use the type attribute to specify the data type.HTML4 provides following types:
Type Description
textA free-form text field, nominally free of line breaks.
password A free-form text field for sensitive information, nominally free of line breaks.
checkbox A set of zero or more values from a predefined list.
radioAn enumerated value.
submit A free form of button initiates form submission.
fileAn arbitrary file with a MIME type and optionally a file name.
image A coordinate, relative to a particular image's size, with the extra semantic that it must be the last value selected and initiates form submission.
hidden An arbitrary string that is not normally displayed to the user.
select An enumerated value, much like the radio type.
textarea A free-form text field, nominally with no line break restrictions.
button A free form of button which can initiates any event related to button.
Following is the simple example of using labels, radio buttons, and submit buttons:
...
<form action="http://example.com/cgiscript.pl" method="post">
    <p>
    <label for="firstname">first name: </label>
              <input type="text" id="firstname"><br />
    <label for="lastname">last name: </label>
              <input type="text" id="lastname"><br />
    <label for="email">email: </label>
              <input type="text" id="email"><br>
    <input type="radio" name="sex" value="male"> Male<br>
    <input type="radio" name="sex" value="female"> Female<br>
    <input type="submit" value="send"> <input type="reset">
    </p>
 </form>
 ...

The <input> element in HTML5

Apart from the above mentioned attributes, HTML5 input elements introduced sevral new values for the type attribute. These are listed below.
NOTE: Try all the following example using latest version of Opera browser.
Type Description
datetime A date and time (year, month, day, hour, minute, second, fractions of a second) encoded according to ISO 8601 with the time zone set to UTC.
datetime-localA date and time (year, month, day, hour, minute, second, fractions of a second) encoded according to ISO 8601, with no time zone information.
dateA date (year, month, day) encoded according to ISO 8601.
month A date consisting of a year and a month encoded according to ISO 8601.
weekA date consisting of a year and a week number encoded according to ISO 8601.
time A time (hour, minute, seconds, fractional seconds) encoded according to ISO 8601.
numberThis accepts only numerical value. The step attribute specifies the precision, defaulting to 1.
rangeThe range type is used for input fields that should contain a value from a range of numbers.
emailThis accepts only email value. This type is used for input fields that should contain an e-mail address. If you try to submit a simple text, it forces to enter only email address in email@example.com format.
urlThis accepts only URL value. This type is used for input fields that should contain a URL address. If you try to submit a simple text, it forces to enter only URL address either in http://www.example.com format or in http://example.com format.

The <output> element

HTML5 introduced a new element <output> which is used to represent the result of different types of output, such as output written by a script.
You can use the for attribute to specify a relationship between the output element and other elements in the document that affected the calculation (for example, as inputs or parameters). The value of the for attribute is a space-separated list of IDs of other elements.

The placeholder attribute

HTML5 introduced a new attribute called placeholder. This attribute on <input> and <textarea> elements provides a hint to the user of what can be entered in the field. The placeholder text must not contain carriage returns or line-feeds.
Here is the simple syntax for placeholder attribute:
<input type="text" name="search" placeholder="search the web"/>
This attribute is supported by latest versions of Mozilla, Safari and Crome browsers only.

The autofocus attribute

This is a simple one-step pattern, easily programmed in JavaScript at the time of document load, automatically focus one particular form field.
HTML5 introduced a new attribute called autofocus which would be used as follows:
<input type="text" name="search" autofocus/>
This attribute is supported by latest versions of Mozilla, Safari and Crome browsers only.

The required attribute

Now you do not need to have javascript for client side validations like empty text box would never be submitted because HTML5 introduced a new attribute called required which would be used as follows and would insist to have a value:
<input type="text" name="search" required/>
SVG stands for Scalable Vector Graphics and it is a language for describing 2D-graphics and graphical applications in XML and the XML is then rendered by an SVG viewer.
SVG is mostly useful for vector type diagrams like Pie charts, Two-dimensional graphs in an X,Y coordinate system etc.
SVG became a W3C Recommendation 14. January 2003 and you can check latest version of SVG specification at SVG Specification.

Viewing SVG Files:

Most of the web browsers can display SVG just like they can display PNG, GIF, and JPG. Internet Explorer users may have to install the Adobe SVG Viewer to be able to view SVG in the browser.

Embeding SVG in HTML5

HTML5 allows embeding SVG directly using <svg>...</svg> tag which has following simple syntax:
<svg xmlns="http://www.w3.org/2000/svg">
...    
</svg>
Firefox 3.7 has also introduced a configuration option ("about:config") where you can enable HTML5 using the following steps:
  1. Type about:config in your Firefox address bar.
  2. Click the "I'll be careful, I promise!" button on the warning message that appears (and make sure you adhere to it!).
  3. Type html5.enable into the filter bar at the top of the page.
  4. Currently it would be disabled, so click it to toggle the value to true.
Now your Firefox HTML5 parser should now be enabled and you should be able to experiment with the following examples.

HTML5 - SVG Circle

Following is the HTML5 version of an SVG example which would draw a cricle using <circle> tag:
<!DOCTYPE html>
<head>
<title>SVG</title>
<meta charset="utf-8" />
</head>
<body>
<h2>HTML5 SVG Circle</h2>
<svg id="svgelem" height="200" xmlns="http://www.w3.org/2000/svg">
    <circle id="redcircle" cx="50" cy="50" r="50" fill="red" />
</svg>
</body>
</html>
This would produce following result in HTML5 enabled latest version of Firefox.

HTML5 - SVG Rectangle

Following is the HTML5 version of an SVG example which would draw a rectangle using <rect> tag:
<!DOCTYPE html>
<head>
<title>SVG</title>
<meta charset="utf-8" />
</head>
<body>
<h2>HTML5 SVG Rectangle</h2>
<svg id="svgelem" height="200" xmlns="http://www.w3.org/2000/svg">
    <rect id="redrect" width="300" height="100" fill="red" />
</svg>
</body>
</html>
This would produce following result in HTML5 enabled latest version of Firefox.

HTML5 - SVG Line

Following is the HTML5 version of an SVG example which would draw a line using <line> tag:
<!DOCTYPE html>
<head>
<title>SVG</title>
<meta charset="utf-8" />
</head>
<body>
<h2>HTML5 SVG Line</h2>
<svg id="svgelem" height="200" xmlns="http://www.w3.org/2000/svg">
    <line x1="0" y1="0" x2="200" y2="100"
          style="stroke:red;stroke-width:2"/>
</svg>
</body>
</html>
You can use style attribute which allows you to set additional style information like stroke and fill colors, width of the stroke etc.
This would produce following result in HTML5 enabled latest version of Firefox.

HTML5 - SVG Ellipse

Following is the HTML5 version of an SVG example which would draw an ellipse using <ellipse> tag:
<!DOCTYPE html>
<head>
<title>SVG</title>
<meta charset="utf-8" />
</head>
<body>
<h2>HTML5 SVG Ellipse</h2>
<svg id="svgelem" height="200" xmlns="http://www.w3.org/2000/svg">
    <ellipse cx="100" cy="50" rx="100" ry="50" fill="red" />
</svg>
</body>
</html>
This would produce following result in HTML5 enabled latest version of Firefox.

HTML5 - SVG Polygon

Following is the HTML5 version of an SVG example which would draw a polygon using <polygon> tag:
<!DOCTYPE html>
<head>
<title>SVG</title>
<meta charset="utf-8" />
</head>
<body>
<h2>HTML5 SVG Polygon</h2>
<svg id="svgelem" height="200" xmlns="http://www.w3.org/2000/svg">
    <polygon  points="20,10 300,20, 170,50" fill="red" />
</svg>
</body>
</html>
This would produce following result in HTML5 enabled latest version of Firefox.

HTML5 - SVG Polyline

Following is the HTML5 version of an SVG example which would draw a polyline using <polyline> tag:
<!DOCTYPE html>
<head>
<title>SVG</title>
<meta charset="utf-8" />
</head>
<body>
<h2>HTML5 SVG Polyline</h2>
<svg id="svgelem" height="200" xmlns="http://www.w3.org/2000/svg">
 <polyline points="0,0 0,20 20,20 20,40 40,40 40,60" fill="red" />
</svg>
</body>
</html>
This would produce following result in HTML5 enabled latest version of Firefox.

HTML5 - SVG Gradients

Following is the HTML5 version of an SVG example which would draw a ellipse using <ellipse> tag and would use <radialGradient> tag to define an SVG radial gradient.
Similar way you can use <linearGradient> tag to create SVG linear gradient.
<!DOCTYPE html>
<head>
<title>SVG</title>
<meta charset="utf-8" />
</head>
<body>
<h2>HTML5 SVG Gradient Ellipse</h2>
<svg id="svgelem" height="200" xmlns="http://www.w3.org/2000/svg">
   <defs>
      <radialGradient id="gradient" cx="50%" cy="50%" r="50%"
      fx="50%" fy="50%">
      <stop offset="0%" style="stop-color:rgb(200,200,200);
      stop-opacity:0"/>
      <stop offset="100%" style="stop-color:rgb(0,0,255);
      stop-opacity:1"/>
      </radialGradient>
   </defs>
   <ellipse cx="100" cy="50" rx="100" ry="50" 
      style="fill:url(#gradient)" />
</svg>
</body>
</html>
This would produce following result in HTML5 enabled latest version of Firefox.

Wednesday, 23 October 2013

The HTML syntax of HTML5 allows for MathML elements to be used inside a document using <math>...</math> tags.
Most of the web browsers can display MathML tags. If your browser does not support MathML, then I would suggest you to use latest version of Firefox.
You can check W3 Specification for MathML at MathML 2.0 Specification.

MathML Examples:

Following is a valid HTML5 document with MathML:
<!doctype html>
  <html>
  <head>
  <meta charset="UTF-8">
  <title>Pythagorean theorem</title>
  </head>
  <body>
    <math xmlns="http://www.w3.org/1998/Math/MathML">
      <mrow>
        <msup><mi>a</mi><mn>2</mn></msup>
        <mo>+</mo>
        <msup><mi>b</mi><mn>2</mn></msup>
        <mo>=</mo>
        <msup><mi>c</mi><mn>2</mn></msup>
      </mrow>
    </math>
  </body>
</html> 
This would produce following result:
a2 + b2 = c2

Using MathML Characters:

Consider, following is the markup which makes use of the characters &InvisibleTimes;:
<!doctype html>
  <html>
  <head>
  <meta charset="UTF-8">
  <title>MathML Examples</title>
  </head>
  <body>
    <math xmlns="http://www.w3.org/1998/Math/MathML">
       <mrow>
          <mrow>
             <msup>
                <mi>x</mi>
                <mn>2</mn>
             </msup>
             <mo>+</mo>
             <mrow>
                <mn>4</mn>
                <mo>⁢</mo>
                <mi>x</mi>
             </mrow>
             <mo>+</mo>
             <mn>4</mn>
          </mrow>
             <mo>=</mo>
             <mn>0</mn>
        </mrow>
   </math>
</body>
</html> 
This would produce following result. If you are not able to see proper result like x2 + 4x + 4 = 0, then use Firefox 3.5 or higer version.
x2 + 4x + 4 = 0

Matrix Presentation Examples:

Consider the following example which would be used to represent a simple 2x2 matrix:
<!doctype html>
  <html>
  <head>
  <meta charset="UTF-8">
  <title>MathML Examples</title>
  </head>
  <body>
    <math xmlns="http://www.w3.org/1998/Math/MathML">
       <mrow>
          <mi>A</mi>
          <mo>=</mo>
          <mfenced open="[" close="]">
             <mtable>
                <mtr>
                   <mtd><mi>x</mi></mtd>
                   <mtd><mi>y</mi></mtd>
                </mtr>
                <mtr>
                   <mtd><mi>z</mi></mtd>
                   <mtd><mi>w</mi></mtd>
                </mtr>
             </mtable>
         </mfenced>
      </mrow>
   </math>
</body>
</html> 
This would produce following result. If you are not able to see proper result, then use Firefox 3.5 or higer version.
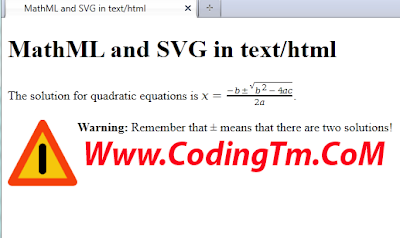
MathML
HTML5 introduces two mechanisms, similar to HTTP session cookies, for storing structured data on the client side and to overcome following drawbacks.
  • Cookies are included with every HTTP request, thereby slowing down your web application by transmitting the same data.
  • Cookies are included with every HTTP request, thereby sending data unencrypted over the internet.
  • Cookies are limited to about 4 KB of data . Not enough to store required data.
The two storages are session storage and local storage and they would be used to handle different situations.
The latest versions of pretty much every browser supports HTML5 Storage including Internet Explorer.

Session Storage:

The Session Storage is designed for scenarios where the user is carrying out a single transaction, but could be carrying out multiple transactions in different windows at the same time.

Example:

For example, if a user buying plane tickets in two different windows, using the same site. If the site used cookies to keep track of which ticket the user was buying, then as the user clicked from page to page in both windows, the ticket currently being purchased would "leak" from one window to the other, potentially causing the user to buy two tickets for the same flight without really noticing.
HTML5 introduces the sessionStorage attribute which would be used by the sites to add data to the session storage, and it will be accessible to any page from the same site opened in that window ie session and as soon as you close the window, session would be lost.
Following is the code which would set a session variable and access that variable:
<!DOCTYPE HTML>
<html>
<body>

  <script type="text/javascript">
    if( sessionStorage.hits ){
       sessionStorage.hits = Number(sessionStorage.hits) +1;
    }else{
       sessionStorage.hits = 1;
    }
    document.write("Total Hits :" + sessionStorage.hits );
  </script>
  <p>Refresh the page to increase number of hits.</p>
  <p>Close the window and open it again and check the result.</p>

</body>
</html>

Local Storage:

The Local Storage is designed for storage that spans multiple windows, and lasts beyond the current session. In particular, Web applications may wish to store megabytes of user data, such as entire user-authored documents or a user's mailbox, on the client side for performance reasons.
Again, cookies do not handle this case well, because they are transmitted with every request.

Example:

HTML5 introduces the localStorage attribute which would be used to access a page's local storage area without no time limit and this local storage will be available whenever you would use that page.
Following is the code which would set a local storage variable and access that variable every time this page is accessed, even next time when you open the window:
<!DOCTYPE HTML>
<html>
<body>

  <script type="text/javascript">
    if( localStorage.hits ){
       localStorage.hits = Number(localStorage.hits) +1;
    }else{
       localStorage.hits = 1;
    }
    document.write("Total Hits :" + localStorage.hits );
  </script>
  <p>Refresh the page to increase number of hits.</p>
  <p>Close the window and open it again and check the result.</p>

</body>
</html>

Delete Web Storage:

Storing sensitive data on local machine could be dangerous and could leave a security hole.
The Session Storage Data would be deleted by the browsers immediately after the session gets terminated.
To clear a local storage setting you would need to call localStorage.remove('key'); where 'key' is the key of the value you want to remove. If you want to clear all settings, you need to call localStorage.clear() method.
Following is the code which would clear complete local storage:
<!DOCTYPE HTML>
<html>
<body>

  <script type="text/javascript">
    localStorage.clear();

    // Reset number of hits.
    if( localStorage.hits ){
       localStorage.hits = Number(localStorage.hits) +1;
    }else{
       localStorage.hits = 1;
    }
    document.write("Total Hits :" + localStorage.hits );
  </script>
  <p>Refreshing the page would not to increase hit counter.</p>
  <p>Close the window and open it again and check the result.</p>

</body>
</html>
The Web SQL Database API isn't actually part of the HTML5 specification but it is a separate specification which introduces a set of APIs to manipulate client-side databases using SQL.
I'm assuming you are a great web developer and if that is the case then no doubt, you would be well aware of SQL and RDBMS concepts.

Web SQL Database will work in latest version of Safari, Chrome and Opera.

The Core Methods:

There are following three core methods defined in the spec that I.m going to cover in this tutorial:
  1. openDatabase: This method creates the database object either using existing database or creating new one.
  2. transaction: This method give us the ability to control a transaction and performing either commit or rollback based on the situation.
  3. executeSql: This method is used to execute actual SQL query.

Opening Database:

The openDatabase method takes care of opening a database if it already exists, this method will create it if it already does not exist.
To create and open a database, use the following code:
var db = openDatabase('mydb', '1.0', 'Test DB', 2 * 1024 * 1024);
Above method took following five paramters:
  1. Database name
  2. Version number
  3. Text description
  4. Size of database
  5. Creation callback
The last and 5th argument, creation callback will be called if the database is being created. Without this feature, however, the databases are still being created on the fly and correctly versioned.

Executing queries:

To execute a query you use the database.transaction() function. This function needs a single argument, which is a function that takes care of actually executing the query as follows:
var db = openDatabase('mydb', '1.0', 'Test DB', 2 * 1024 * 1024);
db.transaction(function (tx) {  
   tx.executeSql('CREATE TABLE IF NOT EXISTS LOGS (id unique, log)');
});
The above query will create a table called LOGS in 'mydb' database.

INSERT Operation:

To create enteries into the table we add simple SQL query in the above example as follows:
var db = openDatabase('mydb', '1.0', 'Test DB', 2 * 1024 * 1024);
db.transaction(function (tx) {
   tx.executeSql('CREATE TABLE IF NOT EXISTS LOGS (id unique, log)');
   tx.executeSql('INSERT INTO LOGS (id, log) VALUES (1, "foobar")');
   tx.executeSql('INSERT INTO LOGS (id, log) VALUES (2, "logmsg")');
});
We can pass dynamic values while creating entering as follows:
var db = openDatabase('mydb', '1.0', 'Test DB', 2 * 1024 * 1024);
db.transaction(function (tx) {  
  tx.executeSql('CREATE TABLE IF NOT EXISTS LOGS (id unique, log)');
  tx.executeSql('INSERT INTO LOGS 
                        (id,log) VALUES (?, ?'), [e_id, e_log];
});
Here e_id and e_log are external variables, and executeSql maps each item in the array argument to the "?"s.

READ Operation:

To read already existing records we use a callback to capture the results as follows:
var db = openDatabase('mydb', '1.0', 'Test DB', 2 * 1024 * 1024);
db.transaction(function (tx) {
   tx.executeSql('CREATE TABLE IF NOT EXISTS LOGS (id unique, log)');
   tx.executeSql('INSERT INTO LOGS (id, log) VALUES (1, "foobar")');
   tx.executeSql('INSERT INTO LOGS (id, log) VALUES (2, "logmsg")');
});
db.transaction(function (tx) {
   tx.executeSql('SELECT * FROM LOGS', [], function (tx, results) {
   var len = results.rows.length, i;
   msg = "<p>Found rows: " + len + "</p>";
   document.querySelector('#status').innerHTML +=  msg;
   for (i = 0; i < len; i++){
      alert(results.rows.item(i).log );
   }
 }, null);
});

Final Example:

So finally, let us keep this example in full fledged HTML5 document as follows and try to run it with Safari browser.
<!DOCTYPE HTML>
<html>
<head>
<script type="text/javascript">
var db = openDatabase('mydb', '1.0', 'Test DB', 2 * 1024 * 1024);
var msg;
db.transaction(function (tx) {
  tx.executeSql('CREATE TABLE IF NOT EXISTS LOGS (id unique, log)');
  tx.executeSql('INSERT INTO LOGS (id, log) VALUES (1, "foobar")');
  tx.executeSql('INSERT INTO LOGS (id, log) VALUES (2, "logmsg")');
  msg = '<p>Log message created and row inserted.</p>';
  document.querySelector('#status').innerHTML =  msg;
});

db.transaction(function (tx) {
  tx.executeSql('SELECT * FROM LOGS', [], function (tx, results) {
   var len = results.rows.length, i;
   msg = "<p>Found rows: " + len + "</p>";
   document.querySelector('#status').innerHTML +=  msg;
   for (i = 0; i < len; i++){
     msg = "<p><b>" + results.rows.item(i).log + "</b></p>";
     document.querySelector('#status').innerHTML +=  msg;
   }
 }, null);
});
</script>
</head>
<body>
<div id="status" name="status">Status Message</div>
</body>
</html>
This would produce following result with latest version of either Safari or Opera:
Log message created and row inserted.

Found rows: 2

foobar

logmsg
Conventional web applications generate events which are dispatched to the web server. For example a simple click on a link requests a new page from the server.
The type of events which are flowing from web browser to the web server may be called client-sent events.
Along with HTML5, WHATWG Web Applications 1.0 introduces events which flow from web server to the web browsers and they are called Server-Sent Events (SSE). Using SSE you can push DOM events continously from your web server to the visitor's browser.
The event streaming approach opens a persistent connection to the server, sending data to the client when new information is available, eliminating the need for continuous polling.
Server-sent events standardizes how we stream data from the server to the client.

Web Application for SSE:

To use Server-Sent Events in a web application, you would need to add an <eventsource> element to the document.
The src attribute of <eventsource> element should point to an URL which should provide a persistent HTTP connection that sends a data stream containing the events.
The URL would point to a PHP, PERL or any Python script which would take care of sending event data consistently. Following is a simple example of web application which would expect server time.
<!DOCTYPE HTML>
<html>
<head>
<script type="text/javascript">
/* Define event handling logic here */
</script>
</head>
<body>
<div id="sse">
   <eventsource src="/cgi-bin/ticker.cgi" />
</div>
<div id="ticker">
   <TIME>
</div>
</body>
</html>

Server Side Script for SSE:

A server side script should send Content-type header specifying the type text/event-stream as follows.
print "Content-Type: text/event-stream\n\n";
After setting Content-Type, server side script would send an Event: tag followed by event name. Following example would send Server-Time as event name terminated by a new line character.
print "Event: server-time\n";
Final step is to send event data using Data: tag which would be followed by integer of string value terminated by a new line character as follows:
$time = localtime();
print "Data: $time\n";
Finally, following is complete ticker.cgi written in perl:
#!/usr/bin/perl

print "Content-Type: text/event-stream\n\n";
while(true){
   print "Event: server-time\n";
   $time = localtime();
   print "Data: $time\n";
   sleep(5);
}

Handle Server-Sent Events:

Let us modify our web application to handle server-sent events. Following is the final example.
<!DOCTYPE HTML>
<html>
<head>
<script type="text/javascript">
   document.getElementsByTagName("eventsource")[0].
            addEventListener("server-time", eventHandler, false);
   function eventHandler(event)
   {
       // Alert time sent by the server
       document.querySelector('#ticker').innerHTML = event.data;

   }
</script>
</head>
<body>
<div id="sse">
   <eventsource src="/cgi-bin/ticker.cgi" />
</div>
<div id="ticker" name="ticker">
   [TIME]
</div>
</body>
</html>
Before testing Server-Sent events, I would suggest to make sure if your web browser supports this concept.

Web Sockets is a next-generation bidirectional communication technology for web applications which operates over a single socket and is exposed via a JavaScript interface in HTML 5 compliant browsers.
Once you get a Web Socket connection with the web server, you can send data from browser to server by calling a send() method, and receive data from server to browser by an onmessage event handler.
Following is the API which creates a new WebSocket object.
var Socket = new WebSocket(url, [protocal] );
Here first argument, url, specifies the URL to which to connect. The second attribute, protocol is optional, and if present, specifies a sub-protocol that the server must support for the connection to be successful.

WebSocket Attributes:

Following are the attribute of WebSocket object. Assuming we created Socket object as mentioned above:
AttributeDescription
Socket.readyStateThe readonly attribute readyState represents the state of the connection. It can have the following values:
  1. A value of 0 indicates that the connection has not yet been established.
  2. A value of 1 indicates that the connection is established and communication is possible.
  3. A value of 2 indicates that the connection is going through the closing handshake.
  4. A value of 3 indicates that the connection has been closed or could not be opened.
Socket.bufferedAmountThe readonly attribute bufferedAmount represents the number of bytes of UTF-8 text that have been queued using send() method.

WebSocket Events:

Following are the events associated with WebSocket object. Assuming we created Socket object as mentioned above:
EventEvent HandlerDescription
openSocket.onopenThis event occurs when socket connection is established.
messageSocket.onmessageThis event occurs when client receives data from server.
errorSocket.onerrorThis event occurs when there is any error in communication.
closeSocket.oncloseThis event occurs when connection is closed.

WebSocket Methods:

Following are the methods associated with WebSocket object. Assuming we created Socket object as mentioned above:
MethodDescription
Socket.send()The send(data) method transmits data using the connection.
Socket.close()The close() method would be used to terminate any existing connection.

WebSocket Example:

A WebSocket is a standard bidirectional TCP socket between the client and the server. The socket starts out as a HTTP connection and then "Upgrades" to a TCP socket after a HTTP handshake. After the handshake, either side can send data.

Client Side HTML & JavaScript Code:

At the time of writing this tutorial, there are only few web browsers supporting WebSocket() interface. You can try following example with latest version of Chrome, Mozilla, Opera and Safari.
<!DOCTYPE HTML>
<html>
<head>
<script type="text/javascript">
function WebSocketTest()
{
  if ("WebSocket" in window)
  {
     alert("WebSocket is supported by your Browser!");
     // Let us open a web socket
     var ws = new WebSocket("ws://localhost:9998/echo");
     ws.onopen = function()
     {
        // Web Socket is connected, send data using send()
        ws.send("Message to send");
        alert("Message is sent...");
     };
     ws.onmessage = function (evt) 
     { 
        var received_msg = evt.data;
        alert("Message is received...");
     };
     ws.onclose = function()
     { 
        // websocket is closed.
        alert("Connection is closed..."); 
     };
  }
  else
  {
     // The browser doesn't support WebSocket
     alert("WebSocket NOT supported by your Browser!");
  }
}
</script>
</head>
<body>
<div id="sse">
   <a href="javascript:WebSocketTest()">Run WebSocket</a>
</div>
</body>
</html>

Install pywebsocket:

Before you test above client program, you need a server which supports WebSocket. Download mod_pywebsocket-x.x.x.tar.gz from pywebsocket which aims to provide a Web Socket extension for Apache HTTP Server ans install it following these steps.
  1. Unzip and untar the downloaded file.
  2. Go inside pywebsocket-x.x.x/src/ directory.
  3. $python setup.py build
  4. $sudo python setup.py install
  5. Then read document by:
    • $pydoc mod_pywebsocket
This will install it into your python environment.

Start the Server

Go to the pywebsocket-x.x.x/src/mod_pywebsocket folder and run the following command:
$sudo python standalone.py -p 9998 -w ../example/
This will start the server listening at port 9998 and use the handlers directory specified by the -w option where our echo_wsh.py resides.
Now using Chrome browser open the html file your created in the beginning. If your browser supports WebSocket(), then you would get alert indicating that your browser supports WebSocket and finally when you click on "Run WebSocket" you would get Goodbye message sent by the server script.

HTML5 element <canvas> gives you an easy and powerful way to draw graphics using JavaScript. It can be used to draw graphs, make photo compositions or do simple (and not so simple) animations.
Here is a simple <canvas> element which has only two specific attributes width and height plus all the core HTML5 attributes like id, name and class etc.
<canvas id="mycanvas" width="100" height="100"></canvas>
You can easily find that <canvas> element in the DOM using getElementById() method as follows:
var canvas  = document.getElementById("mycanvas");
Let us see a simple example on using <canvas> element in HTML5 document.
<!DOCTYPE HTML>
<html>
<head>
<style>
#mycanvas{
   border:1px solid red;
}
</style>
</head>
<body>
   <canvas id="mycanvas" width="100" height="100"></canvas>
</body>
</html>

The Rendering Context:

The <canvas> is initially blank, and to display something, a script first needs to access the rendering context and draw on it.
The canvas element has a DOM method called getContext, used to obtain the rendering context and its drawing functions. This function takes one parameter, the type of context 2d.
Following is the code to get required context along with a check if your browser supports <canvas> element:
var canvas  = document.getElementById("mycanvas");
if (canvas.getContext){   
   var ctx = canvas.getContext('2d');   
   // drawing code here   
} else {   
   // canvas-unsupported code here 
}  

Browser Support

The latest versions of Firefox, Safari, Chrome and Opera all support for HTML5 Canvas but IE8 does not support canvas natively.
You can use ExplorerCanvas to have canvas support through Internet Explorer. You just need to include this javascript as follows:
<!--[if IE]><script src="excanvas.js"></script><![endif]-->

HTML5 features, include native audio and video support without the need for Flash.
The HTML5 <audio> and <video> tags make it simple to add media to a website. You need to set src attribute to identify the media source and include a controls attribute so the user can play and pause the media.

Embedding Video:

Here is the simplest form of embedding a video file in your webpage:
<video src="foo.mp4"  width="300" height="200" controls>
    Your browser does not support the <video> element.   
</video>
The current HTML5 draft specification does not specify which video formats browsers should support in the video tag. But most commonly used video formats are:
  1. Ogg: Ogg files with Thedora video codec and Vorbis audio codec.
  2. mpeg4: MPEG4 files with H.264 video codec and AAC audio codec.
You can use <source> tag to specify media along with media type and many other attributes. A video element allows multiple source elements and browser will use the first recognized format:
<!DOCTYPE HTML>
<html>
<body>
   <video  width="300" height="200" controls autoplay>
       <source src="/html5/foo.ogg" type="video/ogg" />
       <source src="/html5/foo.mp4" type="video/mp4" />
       Your browser does not support the <video> element.
   </video>
</body>
</html>

Video Attribute Specification:

The HTML5 video tag can have a number of attributes to control the look and feel and various functionalities of the control:
AttributeDescription
autoplayThis boolean attribute if specified, the video will automatically begin to play back as soon as it can do so without stopping to finish loading the data.
autobufferThis boolean attribute if specified, the video will automatically begin buffering even if it's not set to automatically play.
controlsIf this attribute is present, it will allow the user to control video playback, including volume, seeking, and pause/resume playback.
heightThis attribut specifies the height of the video's display area, in CSS pixels.
loopThis boolean attribute if specified, will allow video automatically seek back to the start after reaching at the end.
preloadThis attribute specifies that the video will be loaded at page load, and ready to run. Ignored if autoplay is present.
posterThis is a URL of an image to show until the user plays or seeks.
srcThe URL of the video to embed. This is optional; you may instead use the <source> element within the video block to specify the video to embed
widthThis attribut specifies the width of the video's display area, in CSS pixels.

Embedding Audio:

HTML5 supports <audio> tag which is used to embed sound content in an HTML or XHTML document as follows.
<audio src="foo.wav" controls autoplay>
    Your browser does not support the <audio> element.   
</audio>
The current HTML5 draft specification does not specify which audio formats browsers should support in the audio tag. But most commonly used audio formats are ogg, mp3 and wav.
You can use <source> tag to specify media along with media type and many other attributes. An audio element allows multiple source elements and browser will use the first recognized format:
<!DOCTYPE HTML>
<html>
<body>
   <audio controls autoplay>
       <source src="/html5/audio.ogg" type="audio/ogg" />
       <source src="/html5/audio.wav" type="audio/wav" />
       Your browser does not support the <audio> element.
   </audio>
</body>
</html>

Audio Attribute Specification:

The HTML5 audio tag can have a number of attributes to control the look and feel and various functionalities of the control:
AttributeDescription
autoplayThis boolean attribute if specified, the audio will automatically begin to play back as soon as it can do so without stopping to finish loading the data.
autobufferThis boolean attribute if specified, the audio will automatically begin buffering even if it's not set to automatically play.
controlsIf this attribute is present, it will allow the user to control audio playback, including volume, seeking, and pause/resume playback.
loopThis boolean attribute if specified, will allow audio automatically seek back to the start after reaching at the end.
preloadThis attribute specifies that the audio will be loaded at page load, and ready to run. Ignored if autoplay is present.
srcThe URL of the audio to embed. This is optional; you may instead use the <source> element within the video block to specify the video to embed

Handling Media Events:

The HTML5 audio and video tag can have a number of attributes to control various functionalities of the control using Javascript:
EventDescription
abortThis event is generated when playback is aborted.
canplayThis event is generated when enough data is available that the media can be played.
endedThis event is generated when playback completes.
errorThis event is generated when an error occurs.
loadeddataThis event is generated when the first frame of the media has finished loading.
loadstartThis event is generated when loading of the media begins.
pauseThis event is generated when playback is paused.
playThis event is generated when playback starts or resumes.
progressThis event is generated periodically to inform the progress of the downloading the media.
ratechangeThis event is generated when the playback speed changes.
seekedThis event is generated when a seek operation completes.
seekingThis event is generated when a seek operation begins.
suspendThis event is generated when loading of the media is suspended.
volumechangeThis event is generated when the audio volume changes.
waitingThis event is generated when the requested operation (such as playback) is delayed pending the completion of another operation (such as a seek).
Following is the example which allows to play the given video:
<!DOCTYPE HTML>
<head>
<script type="text/javascript">
function PlayVideo(){
   var v = document.getElementsByTagName("video")[0];  
   v.play(); 
}
</script>
</head>
<html>
<body>
   <form>
   <video  width="300" height="200" src="/html5/foo.mp4">
       Your browser does not support the <video> element.
   </video>
   <input type="button" onclick="PlayVideo();"  value="Play"/>
   </form>
</body>
</html>

Configuring Servers for Media Type:

Most servers don't by default serve Ogg or mp4 media with the correct MIME types, so you'll likely need to add the appropriate configuration for this.
AddType audio/ogg .oga
AddType audio/wav .wav
AddType video/ogg .ogv .ogg
AddType video/mp4 .mp4
HTML5 Geolocation API lets you share your location with your favorite web sites. A Javascript can capture your latitude and longitude and can be sent to backend web server and do fancy location-aware things like finding local businesses or showing your location on a map.
Today most of the browsers and mobile devices support Geolocation API. The geolocation APIs work with a new property of the global navigator object ie. Geolocation object which can be created as follows:
var geolocation = navigator.geolocation;
The geolocation object is a service object that allows widgets to retrieve information about the geographic location of the device.

Geolocation Methods:

The geolocation object provides the following methods:
MethodDescription
getCurrentPosition()This method retrieves the current geographic location of the user.
watchPosition()This method retrieves periodic updates about the current geographic location of the device.
clearWatch()This method cancels an ongoing watchPosition call.

Example:

Following is a sample code to use any of the above method:
function getLocation() {
   var geolocation = navigator.geolocation;
   geolocation.getCurrentPosition(showLocation, errorHandler);
}
Here showLocation and errorHandler are callback methods which would be used to get actual position as explained in next section and to handle errors if there is any.

Location Properties:

Geolocation methods getCurrentPosition() and getPositionUsingMethodName() specify the callback method that retrieves the location information. These methods are called asynchronously with an object Position which stores the complete location information.
The Position object specifies the current geographic location of the device. The location is expressed as a set of geographic coordinates together with information about heading and speed.
The following table describes the properties of the Position object. For the optional properties if the system cannot provide a value, the value of the property is set to null.
PropertyTypeDescription
coordsobjectsSpecifies the geographic location of the device. The location is expressed as a set of geographic coordinates together with information about heading and speed.
coords.latitudeNumberSpecifies the latitude estimate in decimal degrees. The value range is [-90.00, +90.00].
coords.longitudeNumberSpecifies the longitude estimate in decimal degrees. The value range is [-180.00, +180.00].
coords.altitudeNumber[Optional] Specifies the altitude estimate in meters above the WGS 84 ellipsoid.
coords.accuracyNumber[Optional] Specifies the accuracy of the latitude and longitude estimates in meters.
coords.altitudeAccuracyNumber[Optional] Specifies the accuracy of the altitude estimate in meters.
coords.headingNumber[Optional] Specifies the device's current direction of movement in degrees counting clockwise relative to true north.
coords.speedNumber[Optional] Specifies the device's current ground speed in meters per second.
timestampdateSpecifies the time when the location information was retrieved and the Position object created.

Example:

Following is a sample code which makes use of Position object. Here showLocation method is a callback method:
function showLocation( position ) {
  var latitude = position.coords.latitude;
  var longitude = position.coords.longitude;
  ...
}

Handling Errors

Geolocation is complicated, and it is very much required to catch any error and handle it gracefully.
The geolocations methods getCurrentPosition() and watchPosition() make use of an error handler callback method which gives PositionError object. This object has following two properties:
PropertyTypeDescription
codeNumberContains a numeric code for the error.
messageStringContains a human-readable description of the error.
The following table describes the possible error codes returned in the PositionError object.
CodeConstantDescription
0UNKNOWN_ERRORThe method failed to retrieve the location of the device due to an unknown error.
1PERMISSION_DENIEDThe method failed to retrieve the location of the device because the application does not have permission to use the Location Service.
2POSITION_UNAVAILABLEThe location of the device could not be determined.
3TIMEOUTThe method was unable to retrieve the location information within the specified maximum timeout interval.

Example:

Following is a sample code which makes use of PositionError object. Here errorHandler method is a callback method:
function errorHandler( err ) {
  if (err.code == 1) {
    // access is denied
  }
  ...
}

Position Options:

Following is the actual syntax of getCurrentPosition() method:
getCurrentPosition(callback, ErrorCallback, options)
Here third argument is the PositionOptions object which specifies a set of options for retrieving the geographic location of the device.
Following are the options which can be specified as third argument:
PropertyTypeDescription
enableHighAccuracyBooleanSpecifies whether the widget wants to receive the most accurate location estimate possible. By default this is false.
timeoutNumberThe timeout property is the number of milliseconds your web application is willing to wait for a position.
maximumAgeNumberSpecifies the expiry time in milliseconds for cached location information.

Example:

Following is a sample code which shows how to use above mentioned methods:
function getLocation() {
   var geolocation = navigator.geolocation;
   geolocation.getCurrentPosition(showLocation, errorHandler,
                                 {maximumAge: 75000});
}
Microdata is a standardized way to provide additional semantics in your web pages.
Microdata lets you define your own customized elements and start embedding custom properties in your web pages. At a high level, microdata consists of a group of name-value pairs.
The groups are called items, and each name-value pair is a property. Items and properties are represented by regular elements.

Example:

  • To create an item, the itemscope attribute is used.
  • To add a property to an item, the itemprop attribute is used on one of the item's descendants.
Here there are two items, each of which has the property "name":
<div itemscope>
 <p>My name is <span itemprop="name">Zara</span>.</p>
</div>

<div itemscope>
 <p>My name is <span itemprop="name">Nuha</span>.</p>
</div>
Properties generally have values that are strings but it can have following data types:

Global Attributes:

Microdata introduces five global attributes which would be available for any element to use and give context for machines about your data.
AttributeDescription
itemscopeThis is used to create an item. The itemscope attribute is a boolean attribute that tells that there is Microdata on this page, and this is where it starts.
itemtypeThis attribute is a valid URL which defines the item and provides the context for the properties.
itemidThis attribute is global identifier for the item.
itempropThis attribute defines a property of the item.
itemrefThis attribute gives a list of additional elements to crawl to find the name-value pairs of the item.

Properties Datatypes:

Properties generally have values that are strings as mentioned in above example but they can also have values that are URLs. Following example has one property, "image", whose value is a URL:
<div itemscope>
 <img itemprop="image" src="tp-logo.gif" alt="TutorialsPoint">
</div>
Properties can also have values that are dates, times, or dates and times. This is achieved using the time element and its datetime attribute.
<div itemscope>
My birthday is:
<time itemprop="birthday" datetime="1971-05-08">
   Aug 5th 1971
</time>
</div>
Properties can also themselves be groups of name-value pairs, by putting the itemscope attribute on the element that declares the property.

Microdata API support:

If a browser supports the HTML5 microdata API, there will be a getItems() function on the global document object. If browser doesn't support microdata, the getItems() function will be undefined.
function supports_microdata_api() {
  return !!document.getItems;
}
Modernizr does not yet support checking for the microdata API, so you’ll need to use the function like the one listed above.
The HTML5 microdata standard includes both HTML markup (primarily for search engines) and a set of DOM functions (primarily for browsers).
You can include microdata markup in your web pages, and search engines that don't understand the microdata attributes will just ignore them. But if you need to access or manipulate microdata through the DOM, you'll need to check whether the browser supports the microdata DOM API.

Defining Microdata Vocabulary:

To define microdata vocabulary you need a namespace URL which points to a working web page. For example http://data-vocabulary.org/Person can be used as the namespace for a personal microdata vocabulary with the following named properties:
  • name - Person name as a simple string
  • Photo - A URL to a picture of the person.
  • URL - A website belonging to the person.
Using about properties a person microdata could be as follows:
<section itemscope itemtype="http://data-vocabulary.org/Person">
<h1 itemprop="name">Andy Runie</h1>
<p>
<img itemprop="photo" src="http://www.example.com/photo.jpg">
</p>
<a itemprop="url" href="http://www.example.com/blog">My Blog</a>
</section>
Google supports microdata as part of their Rich Snippets program. When Google's web crawler parses your page and finds microdata properties that conform to the http://data-vocabulary.org/Person vocabulary, it parses out those properties and stores them alongside the rest of the page data.
Drag and Drop (DnD) is powerful User Interface concept which makes it easy to copy, reorder and deletion of items with the help of mouse clicks. This allows the user to click and hold the mouse button down over an element, drag it to another location, and release the mouse button to drop the element there.
To achieve drag and drop functionality with traditional HTML4, developers would either have to either have to use complex Javascript programming or other Javascript frameworks like jQuery etc.
Now HTML 5 came up with a Drag and Drop (DnD) API that brings native DnD support to the browser making it much easier to code up.
HTML 5 DnD is supported by all the major browsers like Chrome, Firefox 3.5 and Safari 4 etc.

Drag and Drop Events:

There are number of events which are fired during various stages of the drag and drop operation. These events are listed below:
EventsDescription
dragstartFires when the user starts dragging of the object.
dragenterFired when the mouse is first moved over the target element while a drag is occuring. A listener for this event should indicate whether a drop is allowed over this location. If there are no listeners, or the listeners perform no operations, then a drop is not allowed by default.
dragover This event is fired as the mouse is moved over an element when a drag is occuring. Much of the time, the operation that occurs during a listener will be the same as the dragenter event.
dragleave This event is fired when the mouse leaves an element while a drag is occuring. Listeners should remove any highlighting or insertion markers used for drop feedback.
dragFires every time the mouse is moved while the object is being dragged.
dropThe drop event is fired on the element where the drop was occured at the end of the drag operation. A listener would be responsible for retrieving the data being dragged and inserting it at the drop location.
dragend Fires when the user releases the mouse button while dragging an object.
Note: Note that only drag events are fired; mouse events such as mousemove are not fired during a drag operation.

The DataTransfer Object:

The event listener methods for all the drag and drop events accept Event object which has a readonly attribute called dataTransfer. The event.dataTransfer returns DataTransfer object associated with the event as follows:
function EnterHandler(event) {
    DataTransfer dt = event.dataTransfer;
    .............
}
The DataTransfer object holds data about the drag and drop operation. This data can be retrieved and set in terms of various attributes associated with DataTransfer object as explained below:
S.N.DataTransfer attrobutes and their description
1dataTransfer.dropEffect [ = value ]
  • Returns the kind of operation that is currently selected.
  • This attribute can be set, to change the selected operation.
  • The possible values are none, copy, link, and move.
2dataTransfer.effectAllowed [ = value ]
  • Returns the kinds of operations that are to be allowed.
  • This attribute can be set, to change the allowed operations.
  • The possible values are none, copy, copyLink, copyMove, link, linkMove, move, all and uninitialized.
3dataTransfer.types
Returns a DOMStringList listing the formats that were set in the dragstart event. In addition, if any files are being dragged, then one of the types will be the string "Files".
4dataTransfer.clearData( [ format ] )
Removes the data of the specified formats. Removes all data if the argument is omitted.
5dataTransfer.setData(format, data)
Adds the specified data.
6data = dataTransfer.getData(format)
Returns the specified data. If there is no such data, returns the empty string.
7dataTransfer.files
Returns a FileList of the files being dragged, if any.
8dataTransfer.setDragImage(element, x, y)
Uses the given element to update the drag feedback, replacing any previously specified feedback.
9dataTransfer.addElement(element)
Adds the given element to the list of elements used to render the drag feedback.

Drag and Drop Process:

Following are the steps to be carried out to implement Drag and Drop operation:

Step 1: Making an Object Draggable:

Here are steps to be taken:
  • If you want to drag an element, you need to set the draggable attribute to true for that element.
  • Set an event listener for dragstart that stores the data being dragged.
  • The event listener dragstart will set the allowed effects (copy, move, link, or some combination).
Following is the example to make an object dragable:
<!DOCTYPE HTML>
<html>
<head>
<style type="text/css">
#boxA, #boxB {
   float:left;padding:10px;margin:10px; -moz-user-select:none;
}
#boxA { background-color: #6633FF; width:75px; height:75px;  }
#boxB { background-color: #FF6699; width:150px; height:150px; }
</style>
<script type="text/javascript">
function dragStart(ev) {
   ev.dataTransfer.effectAllowed='move';
   ev.dataTransfer.setData("Text", ev.target.getAttribute('id'));
   ev.dataTransfer.setDragImage(ev.target,0,0);
   return true;
}
</script>
</head>
<body>
<center>
<h2>Drag and drop HTML5 demo</h2>
<div>Try to drag the purple box around.</div>

<div id="boxA" draggable="true" 
        ondragstart="return dragStart(event)">
   <p>Drag Me</p>
</div>
<div id="boxB">Dustbin</div>
</center>
</body>
</html>

Step 2: Dropping the Object:

To accept a drop, the drop target has to listen to at least three events.
  • The dragenter event, which is used to determine whether or not the drop target is to accept the drop. If the drop is to be accepted, then this event has to be canceled.
  • The dragover event, which is used to determine what feedback is to be shown to the user. If the event is canceled, then the feedback (typically the cursor) is updated based on the dropEffect attribute's value.
  • Finally, the drop event, which allows the actual drop to be performed.
Following is the example to drop an object into another object:
<!DOCTYPE HTML>
<html>
<head>
<style type="text/css">
#boxA, #boxB {
   float:left;padding:10px;margin:10px;-moz-user-select:none;
}
#boxA { background-color: #6633FF; width:75px; height:75px;  }
#boxB { background-color: #FF6699; width:150px; height:150px; }
</style>
<script type="text/javascript">
function dragStart(ev) {
   ev.dataTransfer.effectAllowed='move';
   ev.dataTransfer.setData("Text", ev.target.getAttribute('id'));
   ev.dataTransfer.setDragImage(ev.target,0,0);
   return true;
}
function dragEnter(ev) {
   event.preventDefault();
   return true;
}
function dragOver(ev) {
    return false;
}
function dragDrop(ev) {
   var src = ev.dataTransfer.getData("Text");
   ev.target.appendChild(document.getElementById(src));
   ev.stopPropagation();
   return false;
}
</script>
</head>
<body>
<center>
<h2>Drag and drop HTML5 demo</h2>
<div>Try to move the purple box into the pink box.</div>

<div id="boxA" draggable="true" 
     ondragstart="return dragStart(event)">
   <p>Drag Me</p>
</div>
<div id="boxB" ondragenter="return dragEnter(event)" 
     ondrop="return dragDrop(event)" 
     ondragover="return dragOver(event)">Dustbin</div>
</center>
</body>
</html>
JavaScript was designed to run in a single-threaded environment, meaning multiple scripts cannot run at the same time. Consider a situation where you need to handle UI events, query and process large amounts of API data, and manipulate the DOM.
Javascript will hang your browser in situation where CPU utilization is high. Let us take a simple example where Javascript goes through a big loop:
<!DOCTYPE HTML>
<html>
<head>
<title>Big for loop</title>
  <script>
      function bigLoop(){
         for (var i = 0; i <= 10000000000; i += 1){
            var j = i;
         }
         alert("Completed " + j + "iterations" );
      }
      function sayHello(){
         alert("Hello sir...." );
      }
  </script>
</head>
<body>
   <input type="button" onclick="bigLoop();" value="Big Loop" />
   <input type="button" onclick="sayHello();" value="Say Hello" />
</body>
</html>
Try above example online to see the result - Try online using any browser. When you click Big Loop button it displays following result in Firefox:

What is Web Workers?

The situation explained above can be handled using Web Workers who will do all the computationally expensive tasks without interrupting the user interface and typically run on separate threads.
Web Workers allow for long-running scripts that are not interrupted by scripts that respond to clicks or other user interactions, and allows long tasks to be executed without yielding to keep the page responsive.
Web Workers are background scripts and they are relatively heavy-weight, and are not intended to be used in large numbers. For example, it would be inappropriate to launch one worker for each pixel of a four megapixel image.
When a script is executing inside a Web Worker it cannot access the web page's window object (window.document), which means that Web Workers don't have direct access to the web page and the DOM API. Although Web Workers cannot block the browser UI, they can still consume CPU cycles and make the system less responsive.

How Web Workers Work?

Web Workers are initialized with the URL of a JavaScript file, which contains the code the worker will execute. This code sets event listeners and communicates with the script that spawned it from the main page. Following is the simple syntax:
var worker = new Worker('bigLoop.js');
If the specified javascript file exists, the browser will spawn a new worker thread, which is downloaded asynchronously. If the path to your worker returns an 404, the worker will fail silently.
If your application has multiple supporting javascript files, you can import them importScripts() method which takes file name(s) as argument separated by comma as follows:
importScripts("helper.js", "anotherHelper.js");
Once the Web Worker is spawned, communication between web worker and its parent page is done using the postMessage() method. Depending on your browser/version, postMessage() can accept either a string or JSON object as its single argument.
Message passed by Web Worker is accessed using onmessage event in the main page. Now let us write our bigLoop example using Web Worker. Below is the main page (hello.htm) which will spawn a web worker to execute the loop and to return the final value of variable j:
<!DOCTYPE HTML>
<html>
<head>
<title>Big for loop</title>
  <script>
      var worker = new Worker('bigLoop.js');
      worker.onmessage = function (event) {
        alert("Completed " + event.data + "iterations" );
      };

      function sayHello(){
         alert("Hello sir...." );
      }
  </script>
</head>
<body>
   <input type="button" onclick="sayHello();" value="Say Hello"/>
</body>
</html>
Following is the content of bigLoop.js file. This makes use of postMessage() API to pass the communication back to main page:
for (var i = 0; i <= 1000000000; i += 1){
   var j = i;
}
postMessage(j);
Now let us keep hello.htm and bigLoop.js file in the same directory and try to access hello.htm using latest version of either Safari or Firefox.
Try above example online to see the result - Try online using latest version of either Safari or Firefox.

Stopping Web Workers:

Web Workers don't stop by themselves but the page that started them can stop them by calling terminate() method.
worker.terminate();
A terminated Web Worker will no longer respond to messages or perform any additional computations. You cannot restart a worker; instead, you can create a new worker using the same URL.

Handling Errors:

The following shows an example of an error handling function in a Web Worker JavaScript file that logs errors to the console. With error handling code, above example would become as following:
<!DOCTYPE HTML>
<html>
<head>
<title>Big for loop</title>
  <script>
      var worker = new Worker('bigLoop.js');
      worker.onmessage = function (event) {
        alert("Completed " + event.data + "iterations" );
      };

      worker.onerror = function (event) {
         console.log(event.message, event);
      };

      function sayHello(){
         alert("Hello sir...." );
      }
  </script>
</head>
<body>
   <input type="button" onclick="sayHello();" value="Say Hello"/>
</body>
</html>

Checking for Browser Support:

Following is the syntax to detect a Web Worker feature support available in a browser:
<!DOCTYPE HTML>
<html>
<head>
<title>Big for loop</title>
  <script src="/js/modernizr-1.5.min.js"></script>
  <script>
   if (Modernizr.webworkers) {
      alert("Congratulation!! you have web workers support." );
   }else{
      alert("Sorry!! you do not have web workers support." );
   }
  </script>
</head>
<body>
   <p>Checking for Browser Support for web workers</p>
</body>
</html>